Are you looking to migrate a website from Flywheel to Siteground? To help with the website migration from Flywheel hosting to Siteground, we created a short tutorial. Luckily you can use a free plugin, but you will also need to make a few tweaks to files because of errors that can occur during the process. In this article, we will outline the steps for migrating a WordPress site from Flywheel to Siteground and other hosting companies like WP Engine.
Website Migration from Flywheel
Who and What is Flywheel Managed Hosting?
There are a lot of website hosting platforms out there, and each one has its own quirks and features. In this demo, we’re going to use SiteGround for the server we are migrating to, but the process should work for many other servers. I’m going to show you how to migrate a website from Flywheel.
Flywheel is a managed WordPress hosting platform, and while it’s very secure, you may run into some issues if you try to migrate a website from it to another server. So I’m going to show you a very simple process that should take less than 15 minutes and help you resolve the typical errors that come up.
Install WP Vivid Backup Plugin for Website Migration
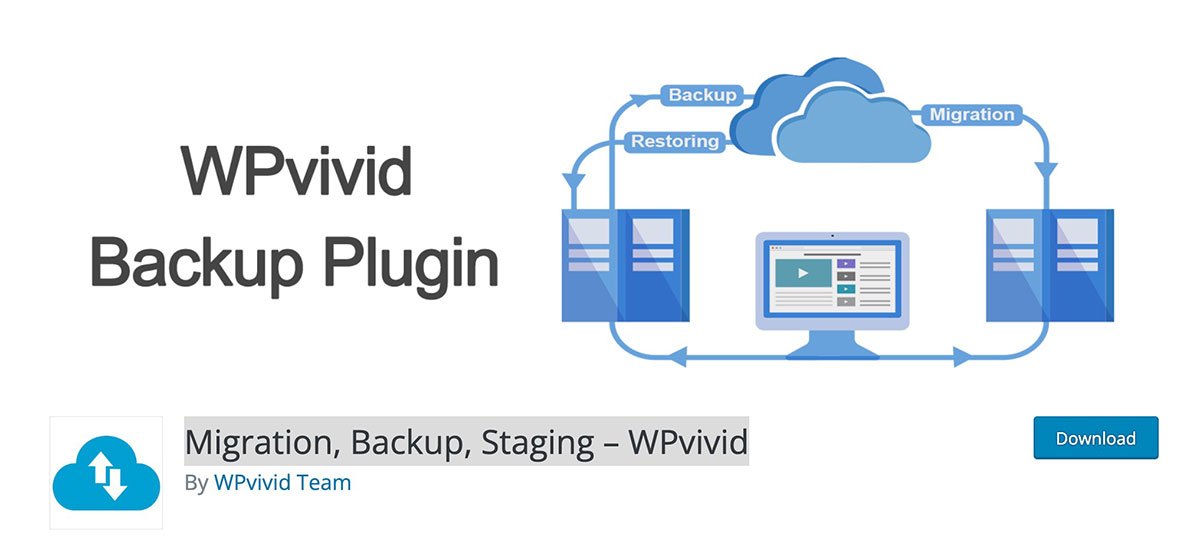
So we are going to use a plugin called WP Vivid Backup plugin. It’s a backup plug and it’s free and it’s on the WordPress.org repository. You can just simply download it or you can search the repository and install it. So what we’re gonna do is install the WP Vivid plugin on the flywheel website that we want to migrate to our Siteground server.
WP Vivid Backup is a great plugin for anyone who needs to backup or migrate their websites. Not only is it free, but it’s also available on the WordPress.org repository. You can either download it or search for it and install it on your server. We’re going to need to install the WP Vivid plugin on the flywheel website before we can migrate it over to our Siteground server.
Create Website Backup On Flywheel Website
After we install the plugin, we’ll need to activate it. The process from here is very straightforward–we’ll use the default settings and save it to our local computer. Once we select the “back up now” button, the software will start backing up our website data.

Install WPvivid Backup Plugin on Siteground Website
While the backup is running on the Flywheel website, we’ll go ahead and install the WPvivid plugin on the new temporary site we created on Siteground as well. We’ll activate it in the same way we did on the original flywheel website, taking us to the plugin settings section.
Download Backup Files
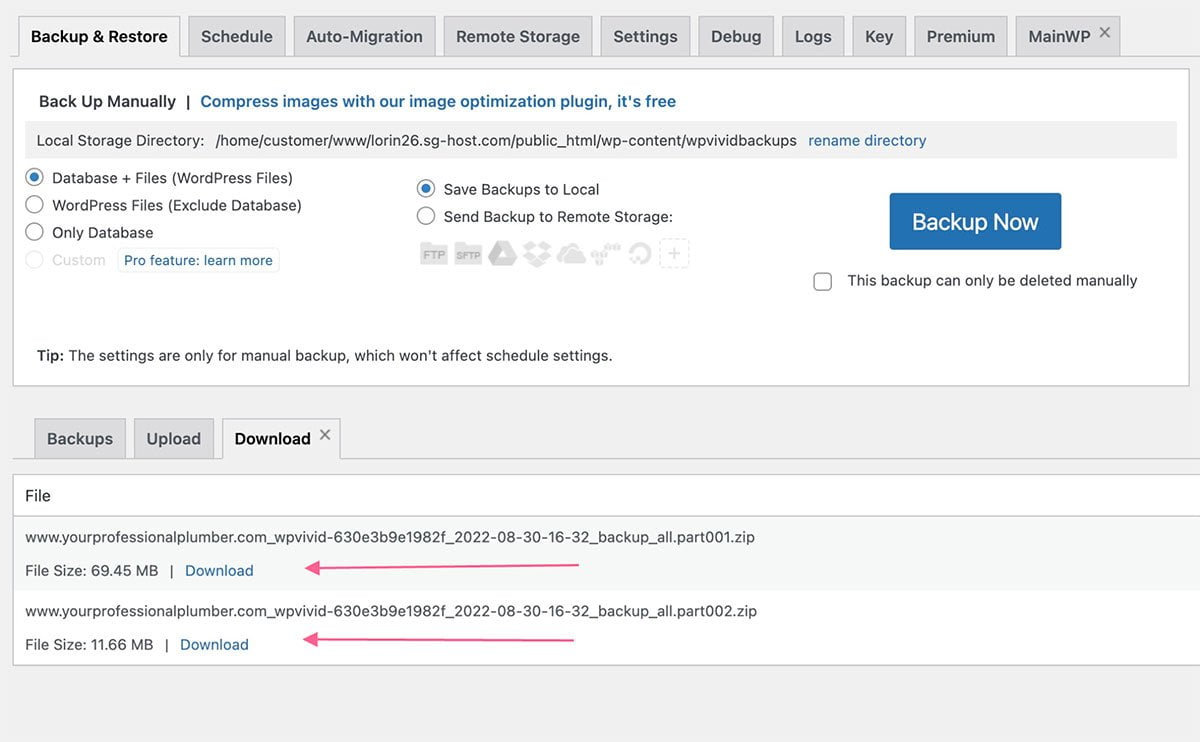
Now return to the original site on Flywheel and once the migration is completed, we will download the backup files. Depending on the size of the site, there could be at least two backup files – part one and part two. Make sure to download both to a folder you can easily find on your desktop.
Import Website on Siteground
Now that we have our files from the original website, we’re ready to begin the migration process. To do this, we’ll go over to Siteground and to the new site’s plugin settings and restore the files that we just downloaded from the original site. To do this, we are going to scroll down to the upload tab and select both the files we just downloaded.
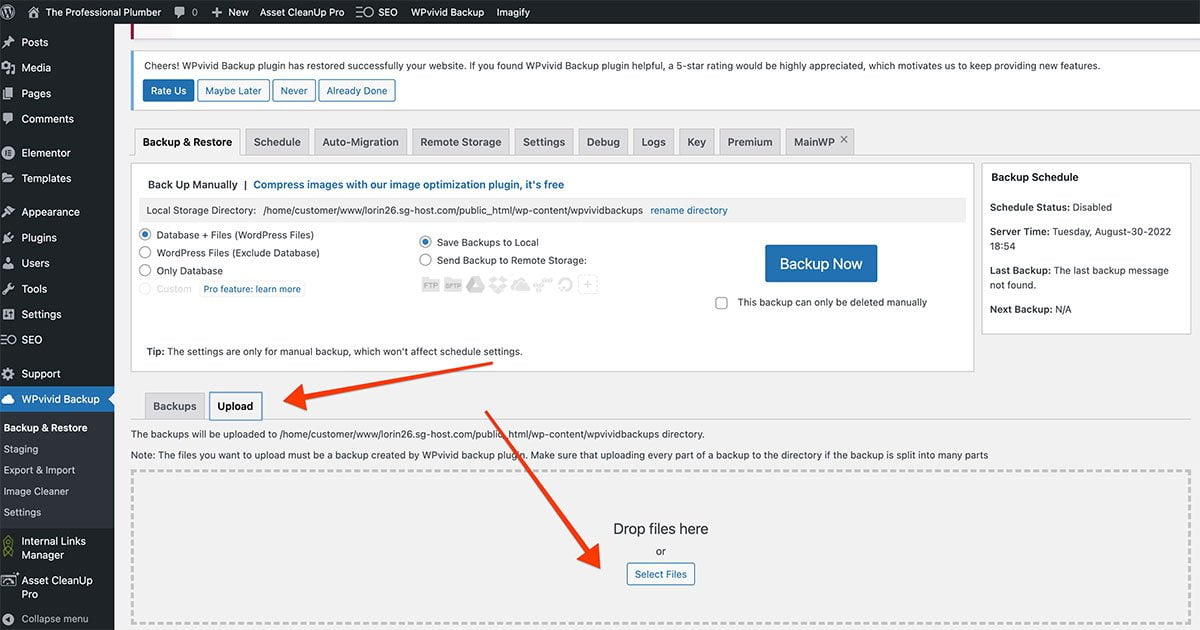
Next select the restore button, make sure you choose “Yes” to continue. Once the file installation process is complete, your are not quite done yet. Visiting the website will now show an error. This is because it’s looking for a file called “.fw-config.php” which flywheel creates causing the website error.

Delete the .fw-config File
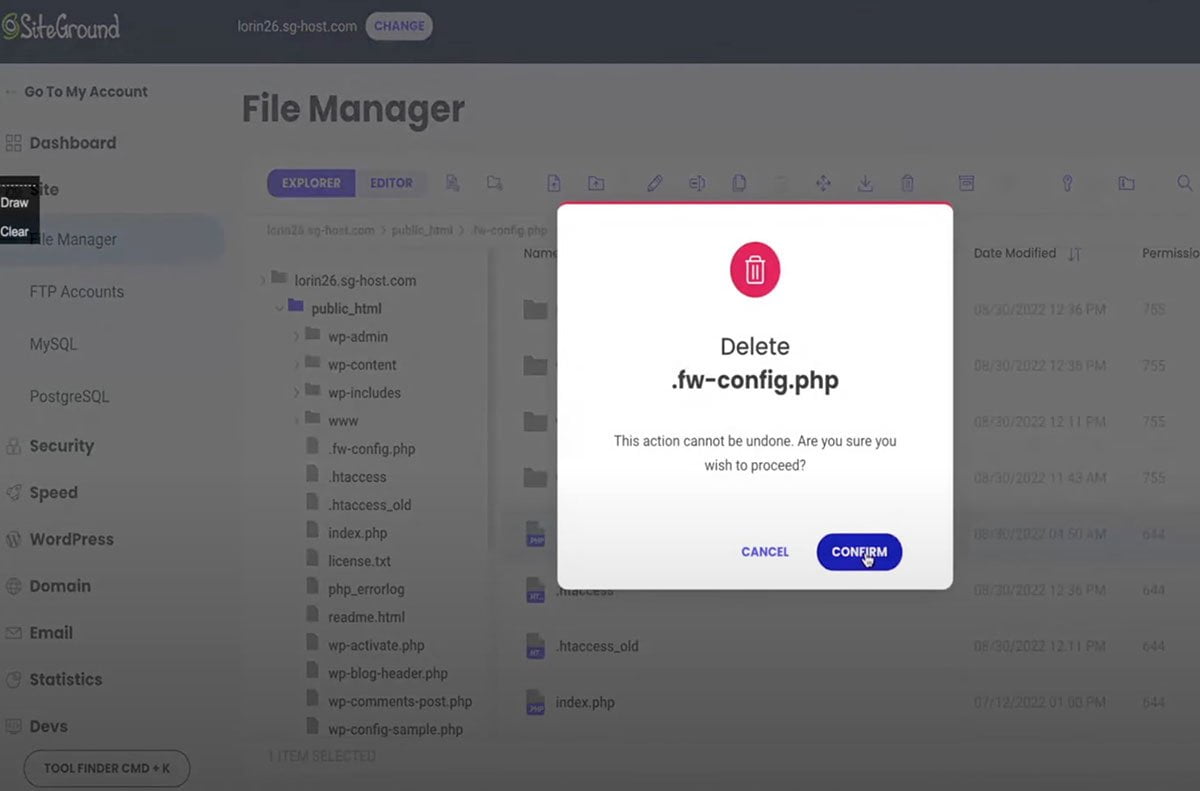
To fix the website error, login to Siteground and go to the website’s file manager and delete the file named: .fw-config.php.
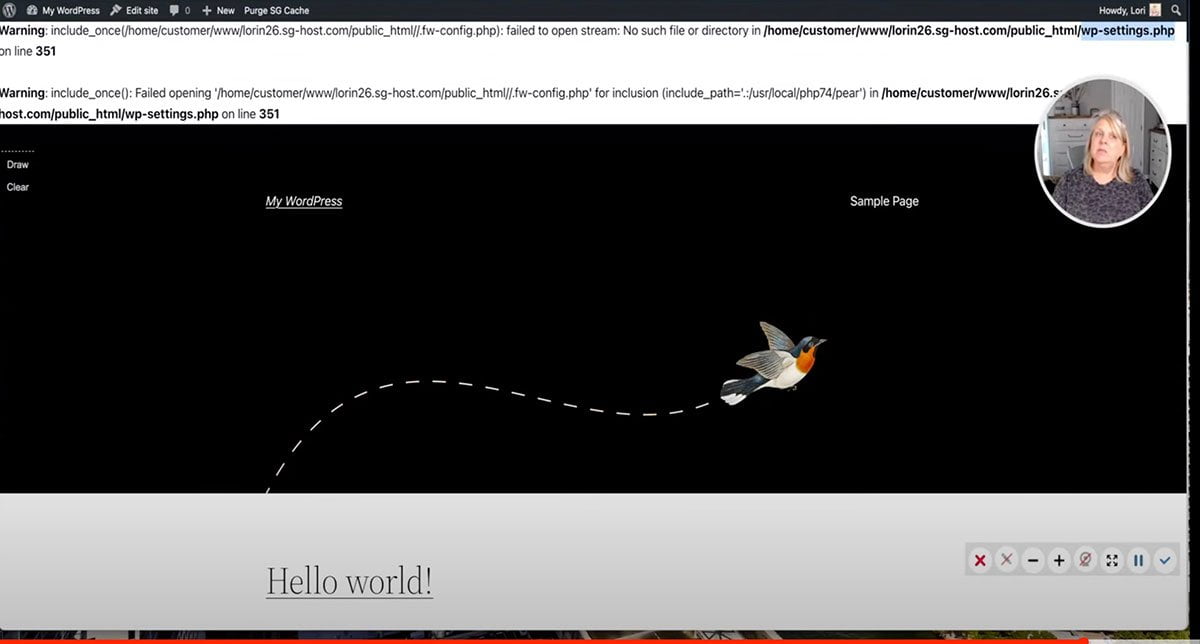
Now return again to the website and you will find yet another error which is letting you know that the .fw-config.php file failed to open (obviously).
Resolve The wp-settings.php Issues
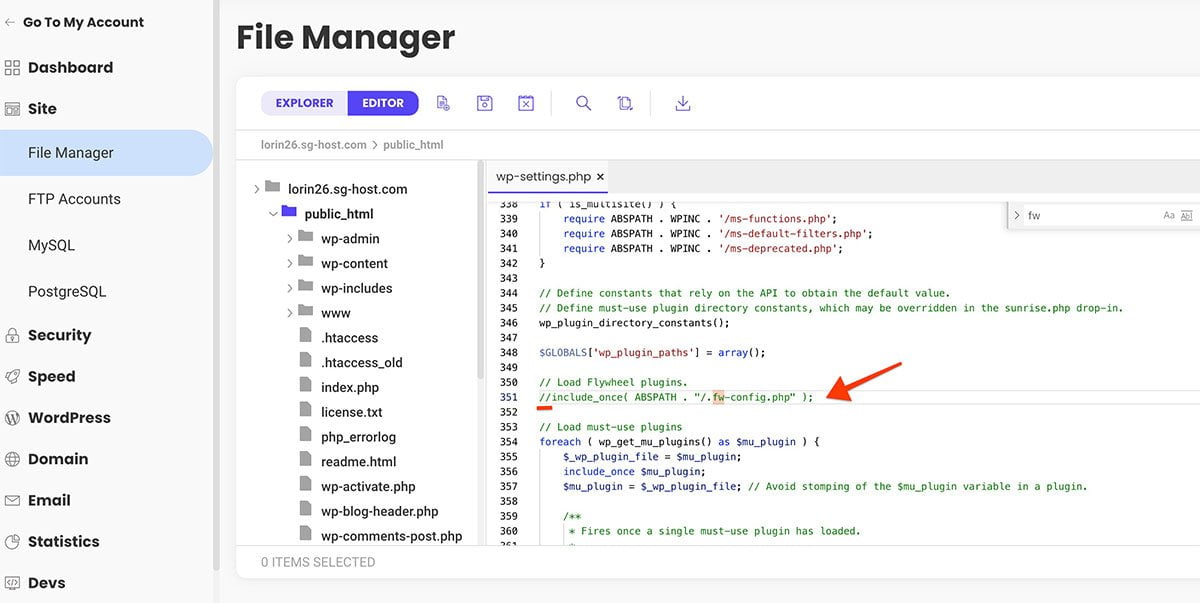
To fix this new error go back to Siteground’s file manager and find the wp-settings.php file. Edit the wp-settings.php file by commenting out the include line for .fw-config.php by add two forward slashes (//) in front of the line. Then save the changes you just made.
Go back to your website, refresh it and now your website displays correctly on your new Siteground server.
Finalizing The Migration Process
Login to the newly migrated website on Siteground by using the same credentials for the original site on Flywheel and resave your permalinks under your WordPress settings. Once you confirm that your website is working properly, the last step obviously is to update the nameservers and dns to point to your Siteground servers. Also be sure to check out our SEO checklist for newly launched websites.
We hope that this tutorial is helpful for you. We’ve had a few inquiries from clients about how to move a flywheel website to another server. Be sure to check out our website migration checklist also. For more information, please check out the video below. If you need WordPress services, don’t hesitate to reach out to us.


